【rabbitMQ】声明队列和交换机
上一篇:springboot整合rabbitMQ模拟简单收发消息
https://blog.csdn.net/m0_67930426/article/details/134904766?spm=1001.2014.3001.5501
相关配置环境参考上篇
springAMQP提供了几个类用来声明声明队列,交换机及其绑定关系
声明队列,交换机及其绑定都在消费者一端完成
目录
基于Bean声明
Fanout
声明交换机
声明队列
交换机绑定队列
Direct
声明交换机
声明队列
交换机绑定队列
基于注解声明
基于Bean声明
Fanout
声明交换机
package com.example.consumer.config;

import org.springframework.amqp.core.FanoutExchange;
import org.springframework.context.annotation.Bean;
import org.springframework.context.annotation.Configuration;

@Configuration
public class FanoutConfig {

    @Bean
    public FanoutExchange fanoutExchange(){
        return new FanoutExchange("a.fanout");

    }

}
另一种写法
    @Bean
    public FanoutExchange fanoutExchange(){
    return   ExchangeBuilder.fanoutExchange("a.fanout").build();
    }
声明队列
@Bean
    public Queue queue1(){
        return new Queue("aaa.queue");
    }
另一种写法
    @Bean
    public Queue queue1(){
        return QueueBuilder.durable("aaa.queue").build();
    }
交换机绑定队列
    @Bean
    public Binding binding1(FanoutExchange fanoutExchange, Queue queue11){
        return BindingBuilder.bind(queue1).to(fanoutExchange);
    }
绑定多个对列
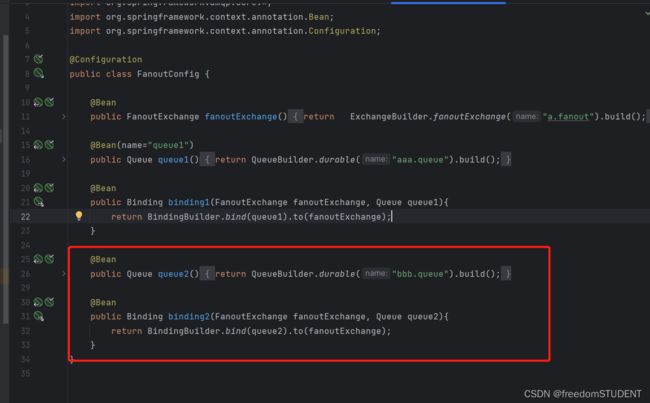
代码:
package com.example.consumer.config;

import org.springframework.amqp.core.*;
import org.springframework.context.annotation.Bean;
import org.springframework.context.annotation.Configuration;

@Configuration
public class FanoutConfig {

    @Bean
    public FanoutExchange fanoutExchange(){
    return   ExchangeBuilder.fanoutExchange("a.fanout").build();
    }

    @Bean(name="queue1")
    public Queue queue1(){
        return QueueBuilder.durable("aaa.queue").build();
    }

    @Bean
    public Binding binding1(FanoutExchange fanoutExchange, Queue queue1){
        return BindingBuilder.bind(queue1).to(fanoutExchange);
    }

    @Bean
    public Queue queue2(){
        return QueueBuilder.durable("bbb.queue").build();
    }

    @Bean
    public Binding binding2(FanoutExchange fanoutExchange, Queue queue2){
        return BindingBuilder.bind(queue2).to(fanoutExchange);
    }
}
Direct
声明交换机
package com.example.consumer.config;

import org.springframework.amqp.core.DirectExchange;
import org.springframework.amqp.core.Queue;
import org.springframework.context.annotation.Bean;
import org.springframework.context.annotation.Configuration;

@Configuration
public class DirectConfig {

    @Bean
    public DirectExchange directExchange(){
        return new DirectExchange("b.direct");
    }
声明队列
 @Bean
    public Queue queue3(){
        return new Queue("ccc.queue");
    }
交换机绑定队列
    @Bean
    public Binding binding3(DirectExchange directExchange, Queue queue3){
        return BindingBuilder.bind(queue3).to(directExchange).with("red");
    }
以上内容创建了一个a.fanout交换机,创建了一个b.direct交换机
创建了aaa.queue队列,bbb.queue队列,ccc.queue队列
a.fanout绑定了aaa.queue,bbb.queue两个队列,b.direct绑定了ccc.queue队列
并且Routing key: " red "
基于注解声明
在基于Bean声明中,如果要再绑定一个Routing key 需要重新创建一个bean,这样势必会麻烦很多
    @RabbitListener(bindings = @QueueBinding(
            value =@Queue(name="eee.queue" ,durable = "true"),
            exchange =@Exchange(name="eee.direct",type= ExchangeTypes.DIRECT ),
            key = {"red","blue"}
    ))
    public void ccc(String msg){
        System.out.println("消费者收到了eee.queue的消息:【"+msg+"】");
    }