Nginx部署BLOG和BBS详细步骤
使用nginx部署wordpress和discuz,用来发布blog和bbs.,服务器环境:
CentOS7.6,IP:172.18.1.251,地址:blog.test.com和bbs.test.com
步骤:
一、域解析
如果没有DNS服务器,可以修改主机host文件,我这里是测试环境,直接修改host文件
windows:,C:\Windows\System32\drivers\etc
增加:
172.18.1.251 blog.test.com
172.18.1.251 bbs.test.com
Linux:,[root@bbs conf]# vim /etc/hosts
172.18.1.251 blog.test.com
172.18.1.251 bbs.test.com
二、部署nginx
我比较喜欢源码编译安装,
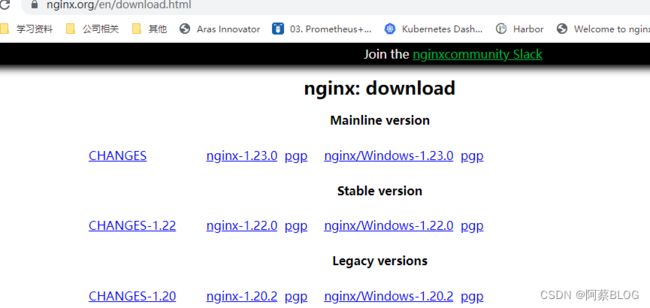
1、下载源码,解压,编译安装。目前稳定版本是1.22
[root@bbs opt]# wget -c https://nginx.org/download/nginx-1.22.0.tar.gz
[root@bbs opt]# ls
nginx-1.22.0.tar.gz
[root@bbs opt]# tar -zxvf nginx-1.22.0.tar.gz
[root@bbs opt]# ls
nginx-1.22.0  nginx-1.22.0.tar.gz
[root@bbs opt]# cd nginx-1.22.0
[root@bbs nginx-1.22.0]# ls
auto  CHANGES  CHANGES.ru  conf  configure  contrib  html  LICENSE  man  README  src
[root@bbs nginx-1.22.0]# ./configure --prefix=/usr/local/nginx/  --with-http_stub_status_module

[root@bbs nginx-1.22.0]# make && make install

[root@bbs nginx-1.22.0]# netstat -ntlp
Active Internet connections (only servers)
Proto Recv-Q Send-Q Local Address           Foreign Address         State       PID/Program name
tcp        0      0 0.0.0.0:22              0.0.0.0:*               LISTEN      8889/sshd
tcp6       0      0 :::22                   :::*                    LISTEN      8889/sshd
[root@bbs nginx-1.22.0]# /usr/local/nginx/sbin/nginx
[root@bbs nginx-1.22.0]# netstat -ntlp
Active Internet connections (only servers)
Proto Recv-Q Send-Q Local Address           Foreign Address         State       PID/Program name
tcp        0      0 0.0.0.0:80              0.0.0.0:*               LISTEN      12511/nginx: master
tcp        0      0 0.0.0.0:22              0.0.0.0:*               LISTEN      8889/sshd
tcp6       0      0 :::22                   :::*                    LISTEN      8889/sshd
[root@bbs nginx-1.22.0]# 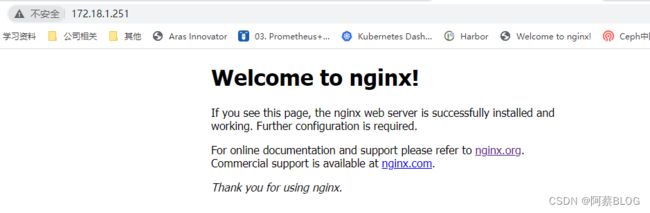
2、配置nginx虚拟主机blog和bbs
[root@bbs nginx-1.22.0]# cd /usr/local/nginx/conf/
[root@bbs conf]# cp nginx.conf nginx.conf.bak
#使用sed去掉配置文件空行和注释行
[root@bbs conf]# sed -e '/^$/d' -e '/#/d' nginx.conf
worker_processes  1;
events {
    worker_connections  1024;
}
http {
    include       mime.types;
    default_type  application/octet-stream;
    sendfile        on;
    keepalive_timeout  65;
    server {
        listen       80;
        server_name  localhost;
        location / {
            root   html;
            index  index.html index.htm;
        }
        error_page   500 502 503 504  /50x.html;
        location = /50x.html {
            root   html;
        }
    }
}
[root@bbs conf]# sed -i -e '/^$/d' -i -e '/#/d' nginx.conf

# 配置文件增加include
include /usr/local/nginx/conf/vhost/*.conf;

#创建虚拟主机配置文件
[root@bbs vhost]# cat blog.test.com.conf
server {
listen 80;
server_name blog.test.com;
location / {
root /usr/local/nginx/html/blog;
index index.html index.htm;
}
}
[root@bbs vhost]# cat bbs.test.com.conf
server {
listen 80;
server_name bbs.test.com;
location / {
root /usr/local/nginx/html/blog;
index index.html index.htm;
}
}
[root@bbs vhost]# ll
总用量 8
-rw-r--r--. 1 root root 124 7月  15 21:53 bbs.test.com.conf
-rw-r--r--. 1 root root 125 7月  15 21:52 blog.test.com.conf
[root@bbs vhost]#

#测试虚拟机
[root@bbs vhost]# cd ../../html/
[root@bbs html]# mkdir -p blog
[root@bbs html]# mkdir -p bbs
[root@bbs html]# echo "this is blog.test.com" > blog/index.html
[root@bbs html]# echo "this is bbs.test.com" > bbs/index.html
[root@bbs html]# /usr/local/nginx/sbin/nginx -s reload
[root@bbs html]# curl blog.test.com
this is blog.test.com
[root@bbs html]# curl bbs.test.com
this is blog.test.com
[root@bbs html]#
三、源码编译安装PHP
[root@bbs opt]# wget -c https://www.php.net/distributions/php-7.2.30.tar.gz
[root@bbs opt]# ls
nginx-1.22.0  nginx-1.22.0.tar.gz  php-7.2.30.tar.gz
[root@bbs opt]# tar -zxvf php-7.2.30.tar.gz
[root@bbs php-7.2.30]# yum -y install gd curl curl-devel libjpeg libjpeg-devel libpng libpng-devel freetype freetype-devel libxml2 libxml2-devel
[root@bbs opt]# cd php-7.2.30
[root@bbs php-7.2.30]# ./configure --prefix=/usr/local/php   --enable-fpm  --enable-debug  --with-gd  --with-jpeg-dir  --with-png-dir  --with-freetype-dir  --enable-mbstring  --with-curl  --with-mysql=mysqlnd  --with-mysqli=mysqlnd  --with-pdo-mysql=mysqlnd  --with-config-file-path=/usr/local/php/etc  --with-zlib-dir

[root@bbs php-7.2.30]# cp php.ini-development  /usr/local/php/etc/php.ini
[root@bbs php-7.2.30]# cp  /usr/local/php/etc/php-fpm.conf.default  /usr/local/php/etc/php-fpm.conf
[root@bbs php-7.2.30]# cp sapi/fpm/init.d.php-fpm /etc/init.d/php-fpm
[root@bbs php-7.2.30]# chmod +x /etc/init.d/php-fpm
[root@bbs php-7.2.30]# export PATH=$PATH:/usr/local/php/bin/
[root@bbs php-7.2.30]# cd /usr/local/php/etc/php-fpm.d/
[root@bbs php-fpm.d]# cp www.conf.default  www.conf
[root@bbs php-fpm.d]# ls
www.conf  www.conf.default
# 启动PHP服务
[root@bbs php-7.2.30]# /etc/init.d/php-fpm start
Starting php-fpm  done
[root@bbs php-7.2.30]# netstat -ntlp
Active Internet connections (only servers)
Proto Recv-Q Send-Q Local Address           Foreign Address         State       PID/Program name
tcp        0      0 127.0.0.1:9000          0.0.0.0:*               LISTEN      7843/php-fpm: maste
tcp        0      0 0.0.0.0:80              0.0.0.0:*               LISTEN      12511/nginx: master
tcp        0      0 0.0.0.0:22              0.0.0.0:*               LISTEN      8889/sshd
tcp6       0      0 :::22                   :::*                    LISTEN      8889/sshd
[root@bbs php-7.2.30]#
四、安装mysql
这里使用yum 安装mariadb
[root@bbs php-7.2.30]# yum install mariadb-sever mariadb
[root@blog ~]# systemctl start mariadb
[root@blog ~]# netstat -ntlp
Active Internet connections (only servers)
Proto Recv-Q Send-Q Local Address           Foreign Address         State       PID/Program name
tcp        0      0 127.0.0.1:9000          0.0.0.0:*               LISTEN      9392/php-fpm: maste
tcp        0      0 0.0.0.0:3306            0.0.0.0:*               LISTEN      9765/mysqld
tcp        0      0 0.0.0.0:80              0.0.0.0:*               LISTEN      9386/nginx: master
tcp        0      0 0.0.0.0:22              0.0.0.0:*               LISTEN      8901/sshd
tcp6       0      0 :::22                   :::*                    LISTEN      8901/sshd
[root@blog ~]#
五、修改Nginx配置文件,启动php
[root@blog ~]# vim /usr/local/nginx/conf/vhost/blog.test.com.conf

修改如下

   listen 80;
   server_name blog.test.com;
        location / {
        root /usr/local/nginx/html/blog;
        index index.php;
        }

        location ~ \.php$ {
         root           /usr/local/nginx/html/blog;
         fastcgi_pass   127.0.0.1:9000;
         fastcgi_index  index.php;
         fastcgi_param  SCRIPT_FILENAME  $document_root$fastcgi_script_name;
         include        fastcgi_params;
        }

}


[root@blog vhost]# vim bbs.test.com.conf

server {
   listen 80;
   server_name bbs.test.com;
        location / {
        root /usr/local/nginx/html/bbs;
        index index.php;
        }

        location ~ \.php$ {
         root           /usr/local/nginx/html/bbs;
         fastcgi_pass   127.0.0.1:9000;
         fastcgi_index  index.php;
         fastcgi_param  SCRIPT_FILENAME  $document_root$fastcgi_script_name;
         include        fastcgi_params;
        }

}

#重启nginx服务

[root@blog vhost]# /usr/local/nginx/sbin/nginx -s reload
[root@blog vhost]#
六、安装wordpress和discuz
1、把wordpress和discuz文件下载解压到相应发布目录
[root@blog opt]# tar -xf wordpress-5.2-zh_CN.tar.gz
[root@blog opt]# unzip Discuz_X3.4_SC_UTF8【20200818】.zip
[root@blog opt]# mv wordpress/* /usr/local/nginx/html/blog/
[root@blog opt]# mv upload/ utility/ qqqun.png  readme readme.html  /usr/local/nginx/html/bbs/
[root@blog opt]#
2、浏览器,输入blog.test.com和bbs.test.com,确认是否可以打开wordpress和discuz安装界面

3、出现上面界面,说明服务器部署完成,下面分别来安装wordpress和discuz
1)wordpres
创建wordpress 数据库
[root@blog ~]# mysql -uroot -p
MariaDB [(none)]> create database wordpress charset utf8;
MariaDB [(none)]> grant all on wordpress.* to "wordpress"@localhost identified by "123456";
MariaDB [(none)]> flush privileges;
MariaDB [(none)]> quit
Bye
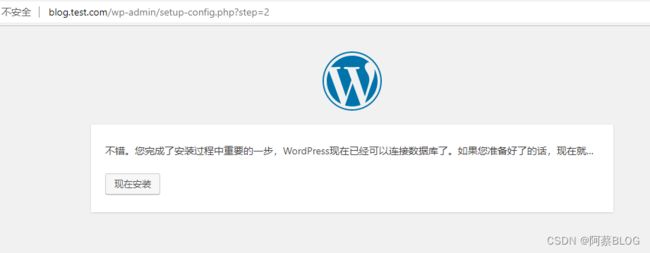
[root@blog ~]# 打开浏览器,地址栏输入:blog.joymed-tech.com,按要求设定数据、站点名等相关信息即可完成安装。

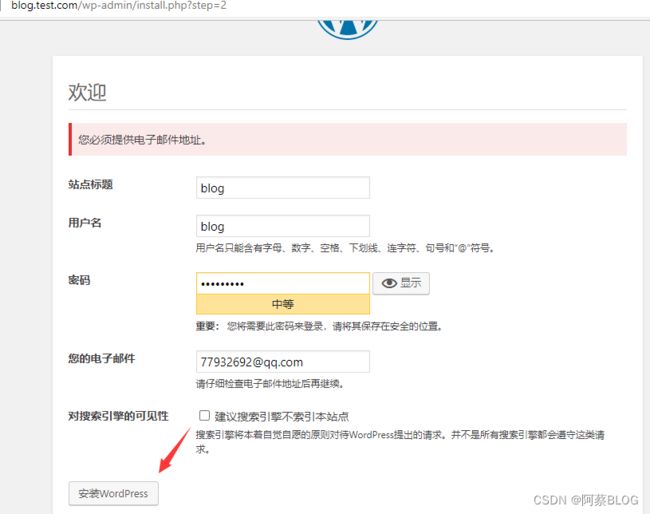

以上安装完成。
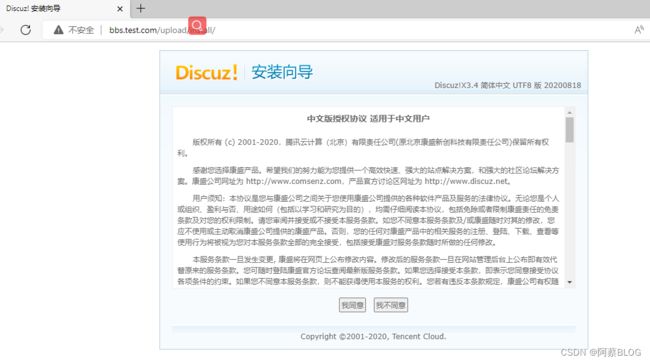
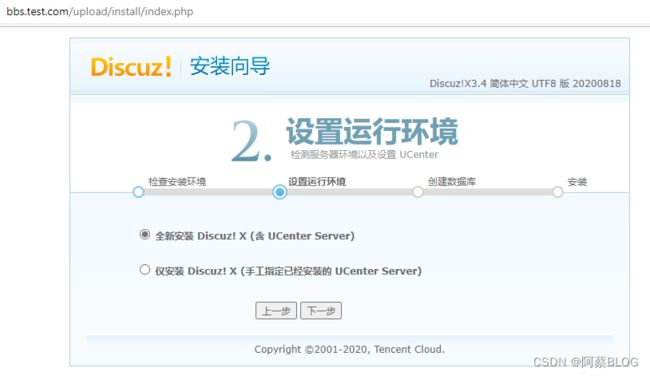
2)安装discuz
打开浏览器,地址栏输入:bbs.test.com/upload

点我同意后,自动时行相关检查,全部通过后完成安装


创建数据库
MariaDB [(none)]> create database bbs charset utf8;
MariaDB [(none)]> grant all on bbs.* to "bbs"@"localhost" identified by "123456";

MariaDB [(none)]> flush privileges;
Query OK, 0 rows affected (0.00 sec)

MariaDB [(none)]> 

出现这个完成了bbs安装。
以上是安装WordPress和discuz详细的安装步骤,涉及到nginx安装,虚拟主机设定,PHP和mysq安装。