haproxy的七层代理和四层代理的实现,详细过程实战版
HAProxy提供高可用性、负载均衡以及基于TCP和HTTP应用的代理,支持虚拟主机,它是免费、快速并且可靠的一种解决方案。HAProxy特别适用于那些负载特大的web站点,这些站点通常又需要会话保持或七层处理。HAProxy运行在当前的硬件上,完全可以支持数以万计的并发连接。并且它的运行模式使得它可以很简单安全的整合进您当前的架构中, 同时可以保护你的web服务器不被暴露到网络上。
HAProxy实现了一种事件驱动, 单一进程模型,此模型支持非常大的并发连接数。多进程或多线程模型受内存限制 、系统调度器限制以及无处不在的锁限制,很少能处理数千并发连接。事件驱动模型因为在有更好的资源和时间管理的用户空间(User-Space) 实现。
HAProxy 优缺点
1、HAProxy 支持两种代理模式 TCP(四层)和HTTP(七层),也是支持虚拟主机的。
2、HAProxy 的优点能够补充 Nginx 的一些缺点,比如支持 Session 的保持,Cookie 的引导;同时支持通过获取指定的 url 来检测后端服务器的状态。
3、HAProxy 跟 LVS 类似,本身就只是一款负载均衡软件;单纯从效率上来讲 HAProxy 会比 Nginx 有更出色的负载均衡速度,在并发处理上也是优于 Nginx 的。
4、HAProxy 支持 TCP 协议的负载均衡转发,可以对 MySQL 读进行负载均衡,对后端的 MySQL 节点进行检测和负载均衡,大家可以用 LVS+Keepalived 对 MySQL 主从做负载均衡。
5、支持url检测后端的服务器出问题的检测会有很好的帮助。
6、HAProxy 负载均衡策略非常多:Round-robin(轮循)、Weight-round-robin(带权轮循)、source(原地址保持)、RI(请求URL)、rdp-cookie(根据cookie).更多的负载均衡策略比如:动态加权轮循(Dynamic Round Robin),加权源地址哈希(Weighted Source Hash),加权URL哈希和加权参数哈希(Weighted Parameter Hash)已经实现
7、不能做Web服务器即Cache。
8、根据官方文档,HAProxy可以跑满10Gbps-New benchmark of HAProxy at 10 Gbps using Myricom’s 10GbE NICs (Myri-10G PCI-Express),这个作为软件级负载均衡,也是比较惊人的;
9、HAProxy支持虚拟主机
10、经过官方测试统计,haproxy 单位时间处理的最大请求数为20000个,可以同时维护40000-50000个并发连接,最大数据处理能力为10Gbps。综合上述,haproxy是性能优越的负载均衡、反向代理服务器。
Nginx与Haproxy比较:Nginx支持七层、用户量最大,稳定性比较可靠。Haproxy支持四层和七层,支持更多的负载均衡算法,支持session保存等。具体选型看使用场景,目前来说Haproxy由于弥补了一些Nginx的缺点用户量也不断在提升。
HAProxy工作原理
HAProxy由前端(frontend)和后端(backend),前端和后端都可以有多个。也可以只有一个listen块来同时实现前端和后端。这里主要讲一下frontend和backend工作模式。
前端(frontend)区域可以根据HTTP请求的header信息来定义一些规则,然后将符合某规则的请求转发到相应后端(backend)进行处理。
下面直接开始LVS的七层代理实验
首先创建我们的测试环境
用两台服务器来做上游服务器(后台真实服务器)
我这里用的是154和155来做后台服务器,
154上游服务器的配置
首先下载nginx,直接yum下载就好了
yum install nginx -y
然后以添加虚拟主机的方式写配置文件,然后在下面添加如下配置信息
8064是普通的html前端页面的端口
8080是php页面的端口,8080需要本机提前安装且已经启动了php服务
php默认进程是9000,当然也是看自己主机的配置
如果没有php就全改为前端页面测试就好了
我是刚好有php就顺便拿来测试了
[root@server154 ~]# vim /etc/nginx/conf.d/test.conf
server {
        listen       8064;
        server_name  _;
        root         /html;
}
server {
        listen       8080;
        server_name  www.abc.com;
        location ~ \.php$ {
        root         /html/php;
        fastcgi_pass   192.168.121.154:9000;
        fastcgi_index        index.php;
        fastcgi_param  SCRIPT_FILENAME  $document_root$fastcgi_script_name;
        include        fastcgi_params;
        }
        location / {
        root       /html/php;
        index      index.html index.php;
        }
}
然后创建目录,写前端界面信息,能和另一台区分就好了
mkdir /html
mkdir /html/php
echo "this is 154 html" > /html/index.html
还有php的测试代码
[root@server154 ~]# vim /html/php/index.php
<?php
echo "this is 154 php-fpm server
整体目录情况如下
[root@server154 ~]# tree /html/
/html/
├── index.html
└── php
    └── index.php
然后重启动nginx
systemctl restart nginx.service
155上游服务器的配置
也是下载nginx,直接yum下载就好了
yum install nginx -y
然后以添加虚拟主机的方式写配置文件,然后在下面添加如下配置信息
8065是普通的html前端页面的端口
8080是php页面的端口,8080需要本机提前安装且已经启动了php服务
php默认进程是也是9000,当然也是看自己主机的配置
[root@server155 ~]# vim /etc/nginx/conf.d/test.conf
server {
        listen       8065;
        server_name  _;
        root         /html;
}
server {
        listen       8080;
        server_name  www.abc.com;
        location ~ \.php$ {
        root         /html/php;
        fastcgi_pass   192.168.121.155:9000;
        fastcgi_index        index.php;
        fastcgi_param  SCRIPT_FILENAME  $document_root$fastcgi_script_name;
        include        fastcgi_params;
        }
        location / {
        root       /html/php;
        index      index.html index.php;
        }
}
然后创建目录,写前端界面信息,能和另一台区分就好了
mkdir /html
mkdir /html/php
echo "this is 155 html" > /html/index.html
还有php的测试代码
[root@server155 ~]# vim /html/php/index.php
<?php
echo "this is 155 php-fpm server
整体目录情况如下
[root@server155 ~]# tree /html/
/html/
├── index.html
└── php
    └── index.php
然后重启动nginx
systemctl restart nginx.service
后端真实服务器这样就配置好了
Haproxy代理服务器的配置
Haproxy的安装我就不写了,我的上一篇文章有写了详细的安装过程
Haproxy的安装过程
直接开始写配置
[root@server153 ~]# vim  /etc/haproxy.cfg
global
   maxconn         10000
   log             127.0.0.1 local2  info
   user            nobody
   group           nobody
   chroot          /usr/local/haproxy2.8
   daemon

defaults
   mode http
   log    global
   option httplog
   option dontlognull
   option http-server-close
   option forwardfor except 127.0.0.0/8
   option redispatch
   option abortonclose
   retries 3

   timeout http-request 10s
   timeout client  30s
   timeout server  1m
   timeout http-keep-alive 10s
   timeout connect 10s
   timeout check 5s
   timeout queue 15s

   maxconn 50000
   balance roundrobin

frontend http_80_in
   bind 0.0.0.0:80
   log     global
   option  httplog
   option  httpclose
   option  forwardfor

   acl  php_doc  path_end  -i .php .php5
   use_backend  phpServer    if  php_doc
   default_backend  staticServer

backend  phpServer
   mode    http
   use-fcgi-app php-fpm

   server  php1  192.168.121.154:9000 proto fcgi  check inter 3000 fall 2 rise 2  maxconn  500
   server  php2  192.168.121.155:9000 proto fcgi  check inter 3000 fall 2 rise 2  maxconn  500
fcgi-app php-fpm
   log-stderr  global
   docroot     /html/php
   index       index.php

backend  staticServer
   mode    http
   server  nginx1  192.168.121.154:8064  check inter 3000 fall 2 rise 2 maxconn 50000
   server  nginx2  192.168.121.155:8065  check inter 3000 fall 2 rise 2 maxconn 50000

listen status
   mode http
   bind :8899
   stats enable
   log global
   stats uri /haproxy-status
   stats auth admin:123456
保存退出然后重启haproxy服务
systemctl restart haproxy.service
可以参考我上一篇安装Haproxy的文章来安装haproxy
源码安装默认是没有systemctl命令来管理的
然后用另一台服务器来访问153代理服务器测试
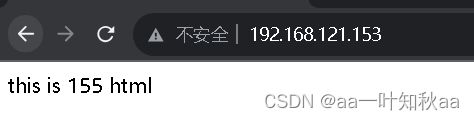
可以看到我们访问153的80端口可以转发到154的8064和155的8065端口
说明我们的haproxy四层代理转发是没有问题的
[root@server156 ~]# curl 192.168.121.153
this is 154 html
[root@server156 ~]# curl 192.168.121.153
this is 155 html
[root@server156 ~]# curl 192.168.121.153:80
this is 154 html
[root@server156 ~]# curl 192.168.121.153:80
this is 155 html

然后再去浏览器测试我们的php端口
查看php页面的的情况


我们的默认根目录是/html,只有匹配到.php结尾才转发到对应目录下
我们访问的是默认目录的/index.php,但是默认根目录下是没有这个文件的说明haproxy的七层代理也转发成功了
haproxy的四层代理和七层代理实现这样就完成了