win10用cython将python打包成.pyd文件
目录
一.准备
二.安装
2.1 安装VC++2015
2.2 配置MinGW
2.1 安装cython
三.Python配置
3.1 添加distutils.cfg文件
3.2 修改cygwinccompiler.py文件
3.3 转换python36.dll文件
3.4 转换vcruntime140.dll文件
四.测试
4.1 创建测试文件
4.2 打包pyd
4.3 测试
一.准备
使用环境:win10 + python3.6.8
所需软件:
1. VC++ 2015: https://blogs.msdn.microsoft.com/pythonengineering/2016/04/11/unable-to-find-vcvarsall-bat/

2. MInGW32: 链接: https://pan.baidu.com/s/1WZNKvJ3Y4yxX7IQdHDeV_g 密码: flr7
二.安装
2.1 安装VC++2015
双击visualcppbuildtools_full.exe,注意改成自定义方式。

选择win10 SDK后,下一步点安装。

安装需要点时间,续杯咖啡☕️。
2.2 配置MinGW
将下载的MinGW.7z放在C盘根目录解压,配置环境变量(如何找到环境变量),双击系统变量中的Path

添加这两个路径,根据自己的实际路径修改

点确定就配置好了。
2.1 安装cython
运行命令:
pip3 install cython三.Python配置
3.1 添加distutils.cfg文件
进入python安装目录C:\Python36\Lib\distutils,添加distutils.cfg文件,写入以下内容:
[build]
compiler=msvc

[build_ext]
compiler=msvc
3.2 修改cygwinccompiler.py文件
进入python安装目录C:\Python36\Lib\distutils,修改cygwinccompiler.py文件,将以下代码添加到get_msvcr()函数,代码中到1916,请根据ValueError: Unknown MS Compiler version 1916错误信息修改
elif msc_ver == '1916':
    # Visual Studio 2015 / Visual C++ 14.0
    # "msvcr140.dll no longer exists"
    return ['vcruntime140']
完整函数如下:
def get_msvcr():
    """Include the appropriate MSVC runtime library if Python was built
    with MSVC 7.0 or later.
    """
    msc_pos = sys.version.find('MSC v.')
    if msc_pos != -1:
        msc_ver = sys.version[msc_pos+6:msc_pos+10]
        if msc_ver == '1300':
            # MSVC 7.0
            return ['msvcr70']
        elif msc_ver == '1310':
            # MSVC 7.1
            return ['msvcr71']
        elif msc_ver == '1400':
            # VS2005 / MSVC 8.0
            return ['msvcr80']
        elif msc_ver == '1500':
            # VS2008 / MSVC 9.0
            return ['msvcr90']
        elif msc_ver == '1600':
            # VS2010 / MSVC 10.0
            return ['msvcr100']
        elif msc_ver == '1916':
            # Visual Studio 2015 / Visual C++ 14.0
            # "msvcr140.dll no longer exists"
            return ['vcruntime140']
        else:
            raise ValueError("Unknown MS Compiler version %s " % msc_ver)
3.3 转换python36.dll文件
复制C:\Python36\python36.dll文件到桌面,在桌面空白处按住shift,点击右键,选择在此处打开 Powershell窗口,执行命令:
gendef python36.dll
dlltool -D python36.dll -d python36.def -l libpython36.a将生成的libpython36.a文件复制到C:\Python36\libs下替换(替换前建议备份)
3.4 转换vcruntime140.dll文件
复制C:\Python36\vcruntime140.dll文件到桌面,执行命令:
gendef vcruntime140.dll
dlltool -D vcruntime140.dll -d vcruntime140.def -l libvcruntime140.a将生成的libvcruntime140.a文件复制到C:\Python36\libs文件夹下。
四.测试
4.1 创建测试文件
新建test.py文件,写入以下内容:
def test_print(input_str):
print(input_str)在同一文件夹下新建setup.py文件,写入以下内容:
from distutils.core import setup
from Cython.Build import cythonize
setup(ext_modules = cythonize(["test.py"]))  # 列表中是要加密的文件名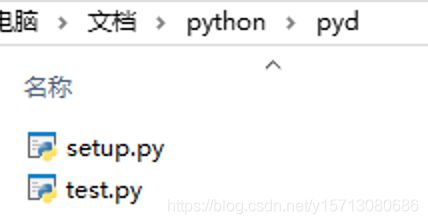
4.2 打包pyd
在当前文件夹下,打开Powershell窗口,执行以下命令:(不要写成python3)
python setup.py build_ext生成文件如下:

4.3 测试
将test.cp36-win_amd64.pyd重命名为test.pyd。注意:不要将test名字改掉,就是打包后的pyd名字和之前的py名字要一致,不然在导入时会报错“dynamic module does not define module export function (PyInit_person)”
在当前文件下新建main.py文件,写入以下内容:
import test

test.test_print("Hello World!")运行main.py文件,正常运行则打包成功!
