【云原生进阶之PaaS中间件】第一章Redis-1.5.1安装配置
1 Redis环境安装配置
在本节中,您将了解和学习Redis的环境安装设置。
1.1 在Ubuntu上安装Redis
要在Ubuntu上安装Redis,打开终端并键入以下命令 -
[yiibai@ubuntu:~]$ sudo apt-get update
[yiibai@ubuntu:~]$ sudo apt-get install redis-server
这将在Ubuntu机器上安装Redis。
1.2 Mac OS上安装Redis
1.2.1 安装步骤
1、首先使用 sudo brew install redis 命令一键安装Redis, 默认会安装在 /usr/local/bin 路径中。
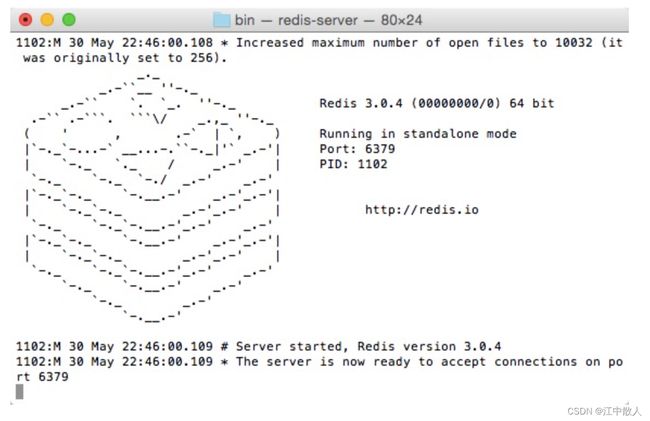
sudo brew install redis2、cd 进入 /usr/local/bin,通过ls可以看到里面会有跟Redis相关的文件,执行 sudo ./redis-server 先开启redis服务, 可以看到 如下界面,表示已经开启 Redis 服务。
3、执行 sudo ./redis-cli 开启客户端即可
上述方法启动redis时是以非密码形式登录的,许多操作可能会出现 (error) NOAUTH Authentication required.
解决此问题的方法之一就是找到 /etc/redis.conf,并将#requirepass 前的 “#” 去掉。由于每个人电脑不同,有可能没法在 /etc 路径下找到redis.conf, 因此可以选择采用第二种方法:
(1)按照原来方式 ./redis-cli 进入redis 客户端, 输入config set requirepass XXX,其中XXX是你要设置的密码。此时会出现 “OK”;
(2)之后返回bin目录下,输入 redis-cli -h 127.0.0.1 -p 6379 -a XXX, 就相当于以密码形式登录了。此后也不会再有身份验证失败问题。
(3)可以使用config get requirepass 查看密码
1.2.2 启动Redis
[yiibai@ubuntu:~]$ redis-server
[2988] 07 Feb 17:09:42.485 # Warning: no config file specified, using the default config. In order to specify a config file use redis-server /path/to/redis.conf
[2988] 07 Feb 17:09:42.488 # Unable to set the max number of files limit to 10032 (Operation not permitted), setting the max clients configuration to 3984.
[2988] 07 Feb 17:09:42.490 # Warning: 32 bit instance detected but no memory lim
                _._
           _.-``__ ''-._
      _.-``    `.  `_.  ''-._           Redis 2.8.4 (00000000/0) 32 bit
  .-`` .-```.  ```\/    _.,_ ''-._
 (    '      ,       .-`  | `,    )     Running in stand alone mode
 |`-._`-...-` __...-.``-._|'` _.-'|     Port: 6379
 |    `-._   `._    /     _.-'    |     PID: 2988
  `-._    `-._  `-./  _.-'    _.-'
 |`-._`-._    `-.__.-'    _.-'_.-'|
 |    `-._`-._        _.-'_.-'    |           http://redis.io
  `-._    `-._`-.__.-'_.-'    _.-'
 |`-._`-._    `-.__.-'    _.-'_.-'|
 |    `-._`-._        _.-'_.-'    |
  `-._    `-._`-.__.-'_.-'    _.-'
      `-._    `-.__.-'    _.-'
          `-._        _.-'
              `-.__.-'

[2988] 07 Feb 17:09:42.581 # Server started, Redis version 2.8.4
[2988] 07 Feb 17:09:42.582 # WARNING overcommit_memory is set to 0! Background s                                                                                        ' to /etc/sysctl.conf and then reboot or run the command 'sysctl vm.overcommit_m
[2988] 07 Feb 17:09:42.582 * The server is now ready to accept connections on po
1.2.3 检查Redis是否正在工作
[yiibai@ubuntu:~]$ redis-cli这将打开一个redis提示,如下所示 -
redis 127.0.0.1:6379>在上面的提示中,127.0.0.1是计算机的IP地址,6379是运行Redis服务器的端口。 现在键入以下PING命令。
redis 127.0.0.1:6379> ping PONG这表明Redis已成功在您的计算机上安装了。
1.3 在Ubuntu上安装Redis桌面管理
要在Ubuntu上安装Redis桌面管理器,可从 http://redisdesktop.com/download 下载该软件包,安装即可。
打开下载的软件包并安装。
Redis桌面管理器将提供用于管理Redis的键和数据的UI。
参考链接
Redis使用详细教程 - wangyuyu - 博客园
Redhat5.8 环境下编译安装 Redis 并将其注册为系统服务
Redis快速入门 -Redis教程

