图像从 tensor 转换为 np.array
首先,利用numpy读取的图像储存格式为 [h,w,c],即图像高度、图像宽度、图像通道数。
而在 PyTorch 中图像的保存形式为 [n,c,h,w],即 batch size,图像通道数,图像高度、图像宽度。
在没有理解这两种形式如何转换的情况下,我竟然直接用 reshape 进行转换!
用numpy表示图像
先用 PIL 打开一张图像,用 .conver('RGB') 将其转换为 RGB 形式,再用 np.array 将其转换为 np.ndarray 格式:
# 导入需要的包
import PIL
from PIL import Image
import numpy as np
# 读入图片
image = PIL.Image.open('01.png').convert('RGB')
img = np.array(image).astype(np.float32)
# 查看数据形状,其形状是[H, W, 3],
print(img)
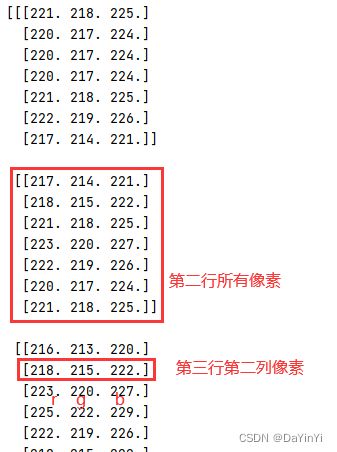
print(img.shape) # (1200, 1920, 3) 其中H代表高度, W是宽度,3代表RGB三个通道图像的 shape 为 (4, 7, 3),也就是说 numpy 是以 (h, w, c) 的格式来存储图片的。
数组中第一层元素为图像的每一行像素,第二层元素为每一列像素,最后一层元素为每一个通道的像素值,它将图片中的每一个像素作为描述单元,记录它三个通道的像素值。
用tensor表示图像
在 PyTorch 中查看一个 batch size 的图像矩阵时,其 shape 为 (batch_size, 3, 224, 224),也就是说在tensor 中是以 (batch, c, h, w) 的格式来存储图片的。
数组中第一层元素为图像的三个通道,第二层元素为某个通道上的一行像素,第三层为该通道上某列的像素值,它将图像某个通道的某行像素值作为描述单元。
import PIL
from PIL import Image
import numpy as np
import matplotlib.pyplot as plt
from matplotlib import transforms
import torchvision.transforms as transforms

img = Image.open('01.png')
ToTensor_transform = transforms.Compose([transforms.ToTensor()])
img_tensor = ToTensor_transform(img)
print(img_tensor)
print(img_tensor.shape) #torch.Size([3, 4, 7]) 
以特征图的形式存在
两种形式的转换
通过 Numpy 的 transpose() 函数:
img_chw = np.transpose(img_hwc, (2,0,1))即按照原本图像 img_hwc 的第 2、第 0 和第 1 维进行排列。