vue 基础 新手快速入门 实例
vue 基础 新手快速入门 实例
文章目录
- vue 基础 新手快速入门 实例
- 1 镜像切换工具
- 2 创建工程
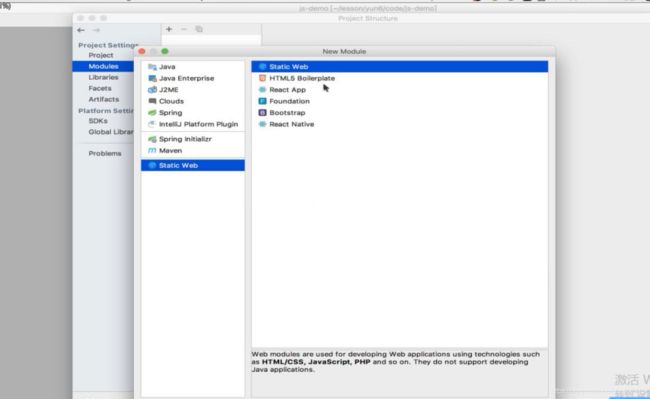
- 2.1创建新新工程 --vue
- 2.2 创建模块,vue-demo
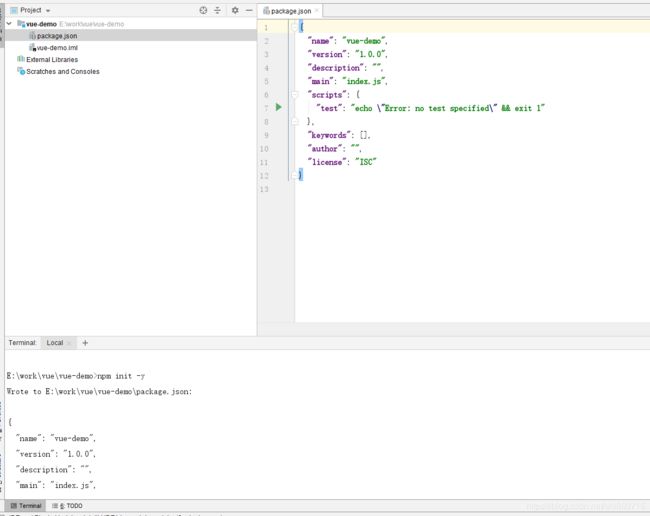
- 2.3 初始化工程
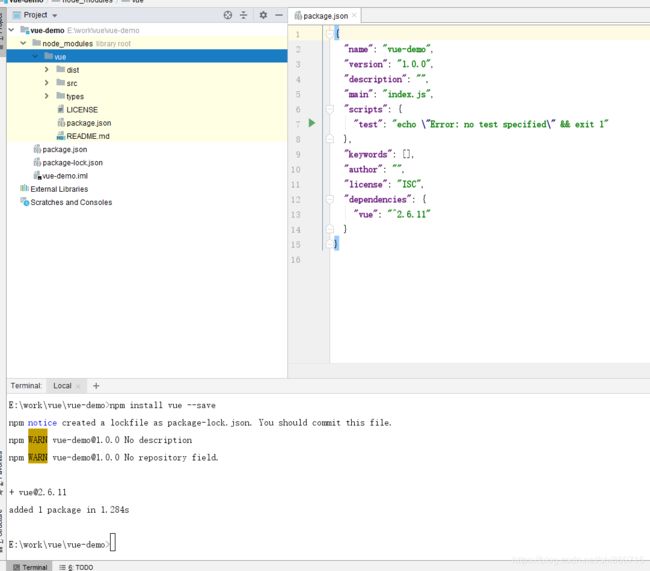
- 2.4 安装vue
- 2.5 vue页面
- 2.6 vue 浏览器插件
- 3 指令
- 3.1 插值表达式
- 3.2 插值闪烁
- 3.3 指令替换
- 3.4 v-model 数据的双向绑定
- 3.5 v-on
- 3.6 事件修饰符
- 3.7 v-for
- 3.8 :key
- 3.9 v-if 和v-show
- 3.10 v-bind
- 3.11 计算属性
- 3.12 监控 watch
- 3.13 全局组件
- 3.14 局部组件
- 3.15 父子之间传递消息
- 3.16 子向父通信
https://cn.vuejs.org/官方网站 还有文档
这里安装使用nodejs的方式进行安装。
建议小伙伴不回nodejs 的可以看飞机:进行安装和版本切换
https://blog.csdn.net/shi860715/article/details/106223238
1 镜像切换工具
npm install nrm -g
C:\Users\Administrator>npm install nrm -g
npm WARN deprecated [email protected]: request has been deprecated, see https://github.com/request/request/issues/3142
npm WARN deprecated [email protected]: Legacy versions of mkdirp are no longer supported. Please update to mkdirp 1.x. (Note that the API surface has changed to use Promises in 1.x.)
npm WARN deprecated [email protected]: CoffeeScript on NPM has moved to "coffeescript" (no hyphen)
C:\Program Files\nodejs\nrm -> C:\Program Files\nodejs\node_modules\nrm\cli.js
+ [email protected]
added 494 packages in 46.845s

C:\Users\Administrator>nrm ls

* npm -------- https://registry.npmjs.org/
  yarn ------- https://registry.yarnpkg.com/
  cnpm ------- http://r.cnpmjs.org/
  taobao ----- https://registry.npm.taobao.org/
  nj --------- https://registry.nodejitsu.com/
  npmMirror -- https://skimdb.npmjs.com/registry/
  edunpm ----- http://registry.enpmjs.org/


C:\Users\Administrator>nrm use taobao


   Registry has been set to: https://registry.npm.taobao.org/


C:\Users\Administrator>nrm test npm

  npm ---- 1794ms


C:\Users\Administrator>nrm test taobao

* taobao - 122ms


C:\Users\Administrator>
nrm ls 查看镜像地址;
nrm test npm 测试速度;
nrm use taobao;
nrm test npm;
C:\Users\Administrator>npm install nrm -g
npm WARN deprecated [email protected]: request has been deprecated, see https://github.com/request/request/issues/3142
npm WARN deprecated [email protected]: Legacy versions of mkdirp are no longer supported. Please update to mkdirp 1.x. (Note that the API surface has changed to use Promises in 1.x.)
npm WARN deprecated [email protected]: CoffeeScript on NPM has moved to "coffeescript" (no hyphen)
C:\Program Files\nodejs\nrm -> C:\Program Files\nodejs\node_modules\nrm\cli.js
+ [email protected]
added 494 packages in 46.845s

C:\Users\Administrator>nrm ls

* npm -------- https://registry.npmjs.org/
  yarn ------- https://registry.yarnpkg.com/
  cnpm ------- http://r.cnpmjs.org/
  taobao ----- https://registry.npm.taobao.org/
  nj --------- https://registry.nodejitsu.com/
  npmMirror -- https://skimdb.npmjs.com/registry/
  edunpm ----- http://registry.enpmjs.org/


C:\Users\Administrator>nrm use taobao


   Registry has been set to: https://registry.npm.taobao.org/


C:\Users\Administrator>nrm test npm

  npm ---- 1794ms


C:\Users\Administrator>nrm test taobao

* taobao - 122ms


C:\Users\Administrator>
2 创建工程
2.1创建新新工程 --vue

2.2 创建模块,vue-demo
2.3 初始化工程
npm init -y
2.4 安装vue
#npm install vue --save
2.5 vue页面
Title
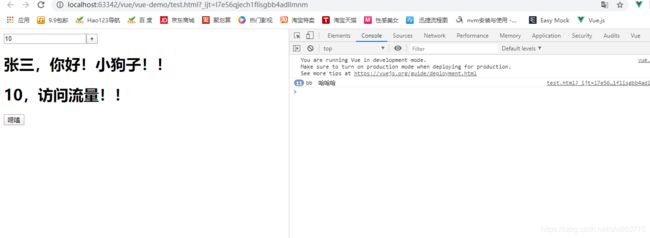
{{ name }},你好!小狗子!!
{{ num }},访问流量!!
运行效果:
2.6 vue 浏览器插件
链接:https://pan.baidu.com/s/10EKpXTgUukUITWHd1eKiCw
提取码:lmhd
复制这段内容后打开百度网盘手机App,操作更方便哦
下载后,解压缩,通过浏览器安装插件。
2.7 运行效果:
3 指令
3.1 插值表达式
{{}}
3.2 插值闪烁
这种方式在网速不好的情况下,会显示成{{name}},{{num}}这样给用户的体验很不好,建议少用
3.3 指令替换
v-text: 将数据输出到元素的内部,如果过输出数据有html,会作为普通文本输出;
v-html: 将数据出处到元素内部,如果有html代码,会被渲染;
v-text
3.4 v-model 数据的双向绑定
上面改的实例中已经有。略 lessons.join(",");
3.5 v-on
在项目中,我们之前用的@click(事件名) 用来绑定事件
3.6 事件修饰符
.stop :阻止事件冒泡
.prevent: 阻止默认事件发生
.capture :使用事件捕获模式
.self : 只有元素自身出发事件才执行(冒泡或捕获都不执行)
.once :只执行一次次
3.7 v-for
<html lang="en">
<head>
   <meta charset="UTF-8">
   <title>Titletitle>

head>
<body>
<div id="app">
   <input type="text" v-model="num"><input type="button" @click="num++" value="+"><br>

   <h1> {{ name }},你好!小狗子!!h1>
   <h1> {{ num }},访问流量!!h1>
   <button @click="say">唠嗑button>

   <hr>

       <ul>
           <li v-for=" ( u,i ) in users">
              {{i}} {{ u.name + "," + u.age + ","+ u.male }}

           li>
       ul>

   <ul>
       <li v-for=" (v,k) in users[0]">
           {{k}} {{v}}

       li>
   ul>
   <ul>
       <li v-for=" (v,k,i) in users[0]">
           {{i}}{{k}} {{v}}

       li>
   ul>
   <ul>
       <li v-for=" i in 5">
           {{i}}

       li>
   ul>
div>
  <script src="node_modules/vue/dist/vue.js">script>


   <script>
        const app = new Vue({
          el:"#app",
          data:{
              name:"张三",
              num:10,
              users:[
                  {name:"二球",age:"10",male:"男"},
                  {name:"张三",age:"10",male:"男"},
                  {name:"李四",age:"10",male:"男"},
                  {name:"王五",age:"10",male:"女"}
              ]


       },
       methods:{
              say(){
                  console.log("bb  哈哈哈");
              }
       }


       });

   script>
body>
html>
3.8 :key
给循环便利的数据指定一个key,这样就不用全部遍历数据,而是只渲染数据修改项,对应的key,这样可以提高渲染效率
-
{{i}}{{k}} {{v}}
3.9 v-if 和v-show
当结果为true时,所在的元素才会被渲染;
V-if="布尔表达式"
v-show 只是想目标元素样式设置长城display:none,而v-if 会把整个元素移除;
使用场景:在一次性判断的过程中,我们使用v-if 会更好。
而在现实效果中,我们需要频繁的达到隐藏和显示的效果时候,我们用v-show 会更好。
两个元素都没错,只是使用场景不一样;
3.10 v-bind
插值表达式不能够操作元素的属性值,且有些元素的属性是特有的,不属于vue的属性。我们可以通过v-bind来更改,将这个元素的属性转换成一个vue属性:
<div class="">

div>
<div v-bind:class="color">// 这里的color 是vue data中的属性

div>
<div :class="color">// 这里的color 是vue data中的属性

div>

完整示例:


<html lang="en">
<head>
    <meta charset="UTF-8">
    <title>Titletitle>
    <style type="text/css">
        #mydiv{
            height: 100px;
            width: 100px;
            border: solid 1px red;

        }
        .red{
            background-color: red;

        }
        .blue{
            background-color: blue;

        }

    style>
head>
<body>
<div id="app">
    <button @click="isRed=!isRed">点我改变颜色button>
    <div id="mydiv" :class="{red:isRed,blue:!isRed}">
        div

    div>

div>
   <script src="node_modules/vue/dist/vue.js">script>


    <script>
         const app = new Vue({
           el:"#app",
           data:{
               name:"张三",
               num:10,
               users:[
                   {name:"二球",age:"10",male:"男"},
                   {name:"张三",age:"10",male:"男"},
                   {name:"李四",age:"10",male:"男"},
                   {name:"王五",age:"10",male:"女"}
               ],
               isRed:true


        },
        methods:{
               say(){
                   console.log("bb  哈哈哈");
               }
        }


        });

    script>
body>
html>
3.11 计算属性
计算属性,看起来像方法,但是还是一个属性。在vue插件中,我们看到他就是一个属性。所以在使用过程中,直接使用
您的生日为:
来使用该属性。计算属性,多次调用,只计算执行一次;

Title
div
您的生日为:
3.12 监控 watch
在watch 监控中,有两点:一个为浅监控,还有一个为深度监控;
注意两点的却别和写的方式。浅监控是根据变量引用地址的改变来实现监控的。
 watch:{
               age(v,oldv){ // 这种方式叫做浅监控,根据值的变化
                 console.log(v,oldv);
               },
                person: {
                   deep:true, // 深度监控,注意些handler 默认的方法
                    handler(val){
                       console.log(val.height);
                    }
                }

             }
完整实例:
Title
div
您的生日为:
{{age}}
3.13 全局组件
Title
3.14 局部组件
Title
3.15 父子之间传递消息
props中的值的名字很重要,要和父组件中的v-bind属性要一致
Title
3.16 子向父通信
原理就是,儿子不能直接修改父亲的属性。而是通过自定义事件,来出发父亲的方法,来改变父亲的属性;
Title