CAS单点登录-基础搭建HelloWorld(二)
CAS单点登录-基础搭建HelloWorld(二)
本章开始对cas的搭建
我们这次用到的cas版本为5.1.3
代码存放在github和码云,欢迎大家下载指点,也可以看wiki项目简介
注意:
环境要求
- Jdk1.8
- Maven3.x
基础知识要求
- spring
- spring boot
- spring cloud
- spring security
- pac4j
1. 手脚架代码下载
官方提供了手脚架工具,可以自定去定义自己的项目,但里面用到了一个query的cdn需要,我也给大家下载好了,放到项目中的original-files文件夹下,可以下载
1.1. 代码下载步骤
如图所示:
填写依赖

输入项目信息:
但发现输入中文会乱码,可以在生成后再调整

点击create project即可下载到代码
2. 代码调整
2.1. 默认信息
- https
- 有部分java代码
- 配置文件不足
2.2. 调整计划
我接下来要调整部分代码涉及到的为:
- 调整maven为国内代理
- 删除java文件
- 修改日志目录
- 屏蔽https
2.2.3. maven调整
由于我们的平台涉及到多个项目所以我们会有一个子工程
先看看我们的parent pom
parent pom:
关注点为cas.version,调整到5.1.3,并且把maven的仓库进行调整
<project xmlns="http://maven.apache.org/POM/4.0.0"
         xmlns:xsi="http://www.w3.org/2001/XMLSchema-instance"
         xsi:schemaLocation="http://maven.apache.org/POM/4.0.0 http://maven.apache.org/xsd/maven-4.0.0.xsd">
    <modelVersion>4.0.0modelVersion>

    <groupId>com.carl.authgroupId>
    <artifactId>ssoartifactId>
    <version>1.0.0-SNAPSHOTversion>
    <packaging>pompackaging>

    <modules>
        <module>sso-servermodule>
    modules>


    <properties>
        <java.version>1.8java.version>
        <project.build.sourceEncoding>UTF-8project.build.sourceEncoding>
        <project.reporting.outputEncoding>UTF-8project.reporting.outputEncoding>
        <maven.compiler.source>1.8maven.compiler.source>
        <maven.compiler.target>1.8maven.compiler.target>
        <cas.version>5.1.3cas.version>
        <springboot.version>1.5.3.RELEASEspringboot.version>
    properties>


    <repositories>
        <repository>
            <releases>
                <enabled>trueenabled>
            releases>
            <id>maven2-releaseid>
            <url>http://uk.maven.org/maven2/url>
        repository>
        <repository>
            <snapshots>
                <enabled>trueenabled>

                <updatePolicy>interval:120updatePolicy>
            snapshots>
            <id>oss-snapshotsid>
            <url>http://repository.jboss.org/nexus/content/groups/public/url>
        repository>
    repositories>

    <organization>
        <name>卡尔科技工作室name>
        <url>http://blog.csdn.net/u010475041url>
    organization>

    <developers>
        <developer>
            <name>Carlname>
            <email>[email protected]email>
            <roles>
                <role>architectrole>
                <role>developerrole>
            roles>
            <organization>卡尔科技工作室organization>
        developer>
    developers>
project>
sso pom:
把多余的删除掉,包括maven仓库,properties信息(已挪到父工程),profile暂时不需要,删除
重点:
需要把cas-server-webapp-tomcat依赖的type调整为war
<project xmlns="http://maven.apache.org/POM/4.0.0" xmlns:xsi="http://www.w3.org/2001/XMLSchema-instance"
    xsi:schemaLocation="http://maven.apache.org/POM/4.0.0 http://maven.apache.org/xsd/maven-4.0.0.xsd">
    <modelVersion>4.0.0modelVersion>

    <parent>
        <groupId>com.carl.authgroupId>
        <artifactId>ssoartifactId>
        <version>1.0.0-SNAPSHOTversion>
        <relativePath>../pom.xmlrelativePath>
    parent>

    <artifactId>sso-serverartifactId>
    <packaging>warpackaging>

    <name>sso-servername>
    <description>CAS认证服务,负责各系统的鉴权的鉴权description>

    <dependencies>
        <dependency>
            <groupId>org.apereo.casgroupId>
            <artifactId>cas-server-webapp-tomcatartifactId>
            <version>${cas.version}version>
            <type>wartype>
            <scope>runtimescope>
        dependency>
    dependencies>
    <dependencyManagement>
        <dependencies>
            <dependency>
                <groupId>org.apereo.casgroupId>
                <artifactId>cas-server-support-bomartifactId>
                <version>${cas.version}version>
                <type>pomtype>
                <scope>importscope>
            dependency>
        dependencies>
    dependencyManagement>

    <build>
        <plugins>
            <plugin>
                <groupId>com.rimerosolutions.maven.pluginsgroupId>
                <artifactId>wrapper-maven-pluginartifactId>
                <version>0.0.5version>
                <configuration>
                    <verifyDownload>trueverifyDownload>
                    <checksumAlgorithm>MD5checksumAlgorithm>
                configuration>
            plugin>
            <plugin>
                <groupId>org.springframework.bootgroupId>
                <artifactId>spring-boot-maven-pluginartifactId>
                <version>${springboot.version}version>
                <configuration>
                    <mainClass>org.springframework.boot.loader.WarLaunchermainClass>
                    <addResources>trueaddResources>
                configuration>
            plugin>
            <plugin>
                <groupId>org.apache.maven.pluginsgroupId>
                <artifactId>maven-war-pluginartifactId>
                <version>3.1.0version>
                <configuration>
                    <warName>caswarName>
                    <failOnMissingWebXml>falsefailOnMissingWebXml>
                    <recompressZippedFiles>falserecompressZippedFiles>
                    <archive>
                        <compress>falsecompress>
                        <manifestFile>${project.build.directory}/war/work/org.apereo.cas/cas-server-webapp-tomcat/META-INF/MANIFEST.MFmanifestFile>
                    archive>
                    <overlays>
                        <overlay>
                            <groupId>org.apereo.casgroupId>
                            <artifactId>cas-server-webapp-tomcatartifactId>
                        overlay>
                    overlays>
                configuration>
            plugin>
            <plugin>
                <groupId>org.apache.maven.pluginsgroupId>
                <artifactId>maven-compiler-pluginartifactId>
                <version>3.3version>
            plugin>
        plugins>
        <finalName>casfinalName>
    build>
project>
日志文件调整:
把etc/cas/config/log4j2.xml 放到项目的src/main/resources 下,并且把内容由
源码就不贴出来了,需要的自行下载
application.properties调整
我们把依赖包下载 的
cas-server-webapp-tomcat/5.1.3/cas-server-webapp-tomcat-5.1.3.war!/WEB-INF/classes/application.properties
拷贝到src/main/resources 下并且进行调整,
重点:
server.ssl.enabled=false若不想拷贝直接用下面的代码即可:
#
# 版权所有.(c)2008-2017. 卡尔科技工作室
#

##
# CAS Server Context Configuration
#
server.context-path=/cas
server.port=8443

 server.ssl.enabled=false

server.max-http-header-size=2097152
server.use-forward-headers=true
server.connection-timeout=20000
server.error.include-stacktrace=NEVER

server.tomcat.max-http-post-size=2097152
server.tomcat.basedir=build/tomcat
server.tomcat.accesslog.enabled=true
server.tomcat.accesslog.pattern=%t %a "%r" %s (%D ms)
server.tomcat.accesslog.suffix=.log
server.tomcat.max-threads=10
server.tomcat.port-header=X-Forwarded-Port
server.tomcat.protocol-header=X-Forwarded-Proto
server.tomcat.protocol-header-https-value=https
server.tomcat.remote-ip-header=X-FORWARDED-FOR
server.tomcat.uri-encoding=UTF-8

spring.http.encoding.charset=UTF-8
spring.http.encoding.enabled=true
spring.http.encoding.force=true

##
# CAS Cloud Bus Configuration
#
spring.cloud.bus.enabled=false

endpoints.enabled=false
endpoints.sensitive=true

endpoints.restart.enabled=false
endpoints.shutdown.enabled=false

management.security.enabled=true
management.security.roles=ACTUATOR,ADMIN
management.security.sessions=if_required
management.context-path=/status
management.add-application-context-header=false

security.basic.authorize-mode=role
security.basic.enabled=false
security.basic.path=/cas/status/**

##
# CAS Web Application Session Configuration
#
server.session.timeout=300
server.session.cookie.http-only=true
server.session.tracking-modes=COOKIE

##
# CAS Thymeleaf View Configuration
#
spring.thymeleaf.encoding=UTF-8
spring.thymeleaf.cache=true
spring.thymeleaf.mode=HTML
##
# CAS Log4j Configuration
#
# logging.config=file:/etc/cas/log4j2.xml
server.context-parameters.isLog4jAutoInitializationDisabled=true

##
# CAS AspectJ Configuration
#
spring.aop.auto=true
spring.aop.proxy-target-class=true

##
# CAS Authentication Credentials
#
cas.authn.accept.users=casuser::Mellon
删除java文件
包括src/main/java,src/test/java,否则会影响运行
最后我们的目录结构应该是这样的:

2.3. 为什么不用ect下的文件?
因为我们大多数开发都在windows,为了配置文件统一,我们直接放到工程下面,后面我们上线了可以放到指定地方不用重新打包即可运行
3. 运行
由于这个项目是spring boot,所以可以用java -jar指令直接运行的,那么我们运行交给cas提供的脚本吧
所有执行命令需要在所在的工程下执行
启动命令:
build.cmd rundebug命令:
开放了
5000远程调整端口
build.cmd debug打包:
build.cmd package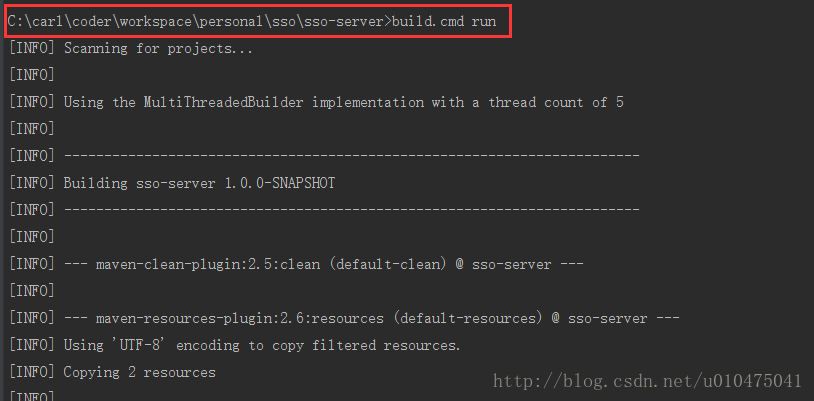
若运行后看到类似如下结果,那恭喜你搭建成功!

3.1 访问测试
目前我们配置的:
- 非https
- 端口为8443
- context-path 为cas
那么我们试着访问 http://localhost:8443/cas
如图所示,再次恭喜你

3.1 尝试登录
默认用户名/密码为:casuser/Mellon
注意:
由于目前为静态配置用户,后面我们会接入数据库,采用默认用户登录即可
登录后结果:

3. 下节计划
会优先讲配置中心或者https的配置
可以先复习一下spring cloud和ssl
4. 总结
- 利用手脚架搭建了cas,并且进行了配置文件的调整
- 简单介绍了cas
代码下载
作者联系方式
如果技术的交流或者疑问可以联系或者提出issue。
QQ: 756884434 (请注明:SSO-CSDN)