服务器上搭shinyApp:shiny-server配置及报错解决
文章目录
- 1. 下载安装shiny-server
- 2. shiny-server的服务器配置
- 3. shiny-server的常规管理操作
- 4. 报错收集
- 报错1 可以登陆了,但是出现闪退: Shiny app - “Disconnected from the server. Reload.”
- 报错2 Error in loadNamespace(name) : there is no package called ‘digest’
- 我们可以通过设置shiny-server登陆方式,在shiny账户下安装R包
- 5. 参考链接
参考链接:
- http://www.bio-info-trainee.com/1677.html
- 官方指南: https://docs.rstudio.com/shiny-server/#getting-started
1. 下载安装shiny-server
1) 打开网址,找到下载地址
打开网址:https://www.rstudio.com/products/shiny/shiny-server/ , 可以看到有多个shiny-server的版本,作为非土豪资助的研究生,目前我们只能先用免费的open source版本

如图所示,点击进入下载shiny-server(open source),会弹出以下页面:
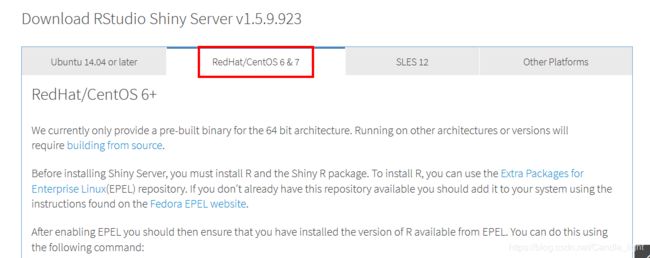
我是CentOS的系统,就直接下载CentOS版本的
2) 根据网页指令下载安装shiny-server.
- (1)先在服务器上装好R语言和shiny的R包
## 首先在服务器上安装R语言
sudo yum install R
## 在Linux的R上安装shiny的R包
sudo su - \
-c "R -e \"install.packages('shiny', repos='https://cran.rstudio.com/')\""
- (2)下载shiny-server并安装
## wget下载
wget https://download3.rstudio.org/centos6.3/x86_64/shiny-server-1.5.9.923-x86_64.rpm
## 安装
sudo yum install --nogpgcheck shiny-server-1.5.9.923-x86_64.rpm
2. shiny-server的服务器配置
shiny-server安装好后,我们就要来看看怎么配置shiny-server啦!
shiny的官方给出了一个详细的配置说明:https://docs.rstudio.com/shiny-server/
但是这个确实很长,有空的时候可以好好琢磨琢磨,我们现在简要说一下重点需要配置哪些内容吧
默认配置文件
shiny-server默认的配置文件存放在路径:/etc/shiny-server/shiny-server.conf 里(注:/opt/shiny-server/config/default.config 也有配置文件,目前可以暂时忽略),如果自己电脑上没这个文件,就要在这个路径自己新建一个。
- 查看配置文件内容
vi /etc/shiny-server/shiny-server.conf
## vi /opt/shiny-server/config/default.config
配置文件内容如下
# Define the user we should use when spawning R Shiny processes
run_as shiny;  ## 指定我们运行shinyapp的user是谁

# Define a top-level server which will listen on a port
server {
  # Instruct this server to listen on port 3838
  listen 3838;  ## 设置shiny-app的监听端口

  # Define the location available at the base URL
  location / {

    # Run this location in 'site_dir' mode, which hosts the entire directory
    # tree at '/srv/shiny-server'
    site_dir /srv/shiny-server; ## shiny-app的存放位置

    # Define where we should put the log files for this location
    log_dir /var/log/shiny-server; ## shiny-app运行过程中产生的日志文件存放位置

    # Should we list the contents of a (non-Shiny-App) directory when the user
    # visits the corresponding URL?
    directory_index on;
  }
}
比较重要的是
- listen 后面需要写上可以开放的监听端口,我的是阿里云的服务器,如何开通服务器端口,可以看这篇教程:https://jingyan.baidu.com/article/e73e26c075d29124acb6a763.html
- site_dir 后是Shiny-App的存放地址
- log_dir 是Shiny-App的运行过程中产生的日志文件,App出现了任何报错,都可以从这个目录下去寻找报错原因
3. shiny-server的常规管理操作
## 重启
sudo systemctl restart shiny-server
##查看状态
sudo systemctl status shiny-server
##开启
sudo systemctl start shiny-server
##停止
sudo systemctl stop shiny-server
4. 报错收集
安装shiny-server的过程并不是一帆风顺的,遇见报错,就要排除bug!
shiny-app运行报错,我们需要重点从以下几个方面查看错误
- 第一,是看shiny-server本身的配置是否运行出错
- 第二,是看咱们写的shiny-App在运行过程中,程序是否有错
## 1. 查看Server-Log, Server-Log提供了shiny-server运行过程中的日志文件
vi /var/log/shiny-server.log file
## 2. 查看App-Log, (App-Log提供了shiny-app运行过程中的报错日志)
cd /var/log/shiny-server
我们配置好端口,开始运行,出现以下报错:
报错1 可以登陆了,但是出现闪退: Shiny app - “Disconnected from the server. Reload.”
- 解决方案链接:
- https://stackoverflow.com/questions/42793154/shiny-app-not-working-on-shiny-server-with-no-log-file-present
- https://stackoverflow.com/questions/42265329/shiny-server-connection-closed-info-typeclose-code4503-reasonthe
使用**ctrl + shift + J**可以直接调出浏览器的连接报错信息 ,也可以用这个报错信息搜索解决方法
- 解决具体办法:
此时我们先去目录/var/log/shiny-server下查看shiny-app的运行日志情况,发现竟然没有App的运行日志???
OK,那是配置文件中没写上,咱们写上即可 - 打开Shiny-Server的配置文件,
sudo vi /etc/shiny-server/shiny-server.conf - 在
run_as shiny;后加上两句话:
sanitize_errors false;
preserve_logs true; ## 此句话,就是让App显示log报错
同时在咱们自己写的shiny-app程序中也加上 options(shiny.sanitize.errors = FALSE) 这句
保存shiny-server的配置,程序也更改后,重启shiny-server即可 sudo systemctl restart shiny-server(注:不重启的话配置不生效!)
- 错误完美解决,可以显示app的Log文件了!
报错2 Error in loadNamespace(name) : there is no package called ‘digest’
此时可以查看Log了,发现闪退的原因是没有装digest这个包。于是启动R,去安装包(library(digest)),安装好后重新运行,但是出现了报错!!!
报错的核心原因是,shiny-server启动关联的R和我们自己启动的R不一致
所以我们刚才安装的digest包并没有安装在shiny-server关联的R所在的library中 (有点绕口-_-!)- 那么,怎么才能更改shiny-server默认的R-path,把我们现在正在用的R位置 关联给shiny-server呢?
非常遗憾,我试了所有方法,还是没找到怎么关联才可以生效。
但是我找到了另一个解决方案,大家可以试试,解决了燃眉之急的报错
我们可以通过设置shiny-server登陆方式,在shiny账户下安装R包
本解决方案参考来源:http://www.itkeyword.com/doc/9991337077264566671/r-how-to-set-the-path-of-install-packages-for-shiny-server-ubuntu
咱们的配置文件里面有一句话是:
run_as shiny; ## 这句话指定我们运行shinyapp的user是shiny (此处也可以叫做Tony老师, John小哥之类的,shiny是默认名字)
所以我们现在就登陆这个user账户,然后在user账户权限下 安装缺失的包!
## 首先,为咱们的user账户shiny,设置密码
sudo passwd shiny ## 输入这句话后,会弹出一个设置密码的框框,咱们自由设置密码就行
## 接着,登陆咱们刚才设置的shiny-user账户
su - shiny  ## 登陆过程中,会让你输入刚才自己设置的密码
## 然后,在此账户下启动 R  (without sudo)
R
## 最后,安装所需要的包:
 install.packages("digest",repos = "https://mirrors.ustc.edu.cn/CRAN/")  ## repos代表下载镜像选清华的
此时错误就成功解决啦!!! 可以正常通过ip访问我们的shinyApp啦
5. 参考链接
报错锦集解决方法:
## shiny-server - Error getting worker: Error: The application exited during initialization
https://github.com/rstudio/shiny-server/issues/353
## An error has occurred The application failed to start. The application exited during initialization
https://github.com/rstudio/shiny-server/issues/153
## access-logs-shiny-server-with-ip-address
https://stackoverflow.com/questions/38714983/access-logs-shiny-server-with-ip-address
shiny-server的权限
- https://support.rstudio.com/hc/en-us/articles/219044787-Root-requirements-for-Shiny-Server
如何更改shiny-server关联的R地址 但是没给出确切答案
- https://stackoverflow.com/questions/35112532/shiny-server-how-to-install-packages-in-localhost