spring-springmvc-mybatis-dubbo-redis-mysql实现soa搭建,数据查询,数据缓存
1:首先介绍windows下安装redis: redis这部分采取 http://blog.csdn.net/jquerys/article/details/48624949博主的博文 我看他上面写的挺好就不自觉写了直接截图重要部分来说
1、Redis简介
redis是一个key-value存储系统。和Memcached类似,它支持存储的value类型相对更多,包括string(字符串)、list(链表)、set(集合)、zset(sorted set --有序集合)和hashs(哈希类型)。这些数据类型都支持push/pop、add/remove及取交集并集和差集及更丰富的操作,而且这些操作都是原子性的。在此基础上,redis支持各种不同方式的排序。与memcached一样,为了保证效率,数据都是缓存在内存中。区别的是redis会周期性的把更新的数据写入磁盘或者把修改操作写入追加的记录文件,并且在此基础上实现了master-slave(主从)同步。
Redis 是一个高性能的key-value数据库。 redis的出现,很大程度补偿了memcached这类key/value存储的不足,在部分场合可以对关系数据库起到很好的补充作用。它提供了Python,Ruby,Erlang,PHP客户端,使用很方便。
2、windows下安装redis
下载地址https://github.com/dmajkic/redis/downloads。下载到的Redis支持32bit和64bit。根据自己实际情况选择,我选择32bit。把32bit文件内容拷贝到需要安装的目录下,比如:D:\dev\redis-2.4.5。
打开一个cmd窗口,使用cd命令切换到指定目录(D:\dev\redis-2.4.5)运行 redis-server.exe redis.conf 。运行以后出现如下界面。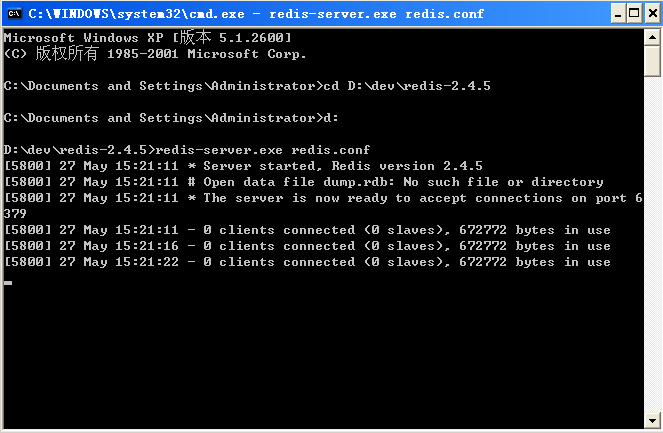
这就说明Redis服务端已经安装成功。
重新打开一个cmd窗口,使用cd命令切换到指定目录(D:\dev\redis-2.4.5)运行 redis-cli.exe -h 127.0.0.1 -p 6379,其中 127.0.0.1是本地ip,6379是redis服务端的默认端口。运行成功如下图所示。
这样,Redis windows环境下搭建已经完成,是不是很简单。
这样,Redis windows环境下搭建已经完成,是不是很简单。
环境已经搭建好,总得测试下吧。比如:存储一个key为test,value为hello word的字符串,然后获取key值。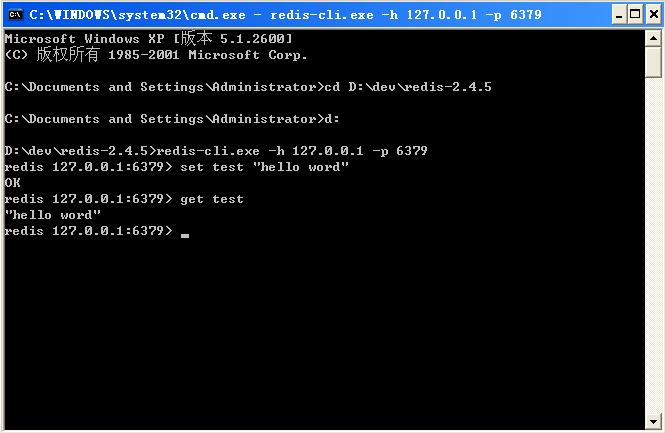
正确输出 hell word,测试成功!
2:dubbo windows下的安装简介:
1:下载zookeeper ,稳定版3.4.8,最新版3.5.1,解压后,进入到conf目录,复制一份zoo_sample.conf,改名为zoo.conf,用无格式编辑器(比如sublime text,notepad等)打开,修改dataDir=/tmp/zookeeper为你的动物园管理员数据存放路径,比如笔者的为D:/软件/ zookeeperData /动物园管理员,修改为dataDir=D:/software/zookeeperData/zookeeper,保存即可,如果要配置ZK集群,还需要其他配置,暂时不说集群这一块,后面涉及到了再说。
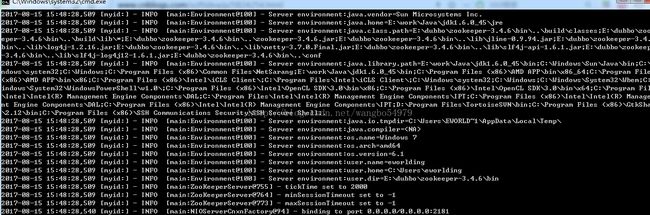
zookeeper国内下载镜像地址:http ://mirrors.hust.edu.cn/apache/zookeeper/ bin /找到启动服务点击运行成功之后
2:下载JDK,maven安装配置这基础的东西就不说了找文档看看就会
3:dubbo-admin.war
这个战争包是阿里达博团队开发的一个可视化操作达博的后台管理服务,可是查看机器,提供者,消费者,以及手动配置负载权重等。将次包下载后,放在tomcat的的的webapps目录下,如果你的tomcat的和动物园管理员不是同一台服务器,需要修改战争包下的配置文件,将地址指向的动物园管理员的服务地址,端口是动物园管理员的端口,默认2181。
环境方面就说到这里了 下面直接截代码了 至于项目的创建步骤我就不一一 截图了 因为我的博文中有发过一篇 一步步怎么创建的
项目整体架构如下: 名字可能起的有点另类

下面一一 看一下 子项目的结构图:
先是action: dubbo文件标错 不要管不影响使用

然后是api:

然后是api-imp 实现:

然后是api-core 核心工具类都放他里面 包括所有的 maven jar包仓库

然后是api-pojo 所有的实体类都放这里:

到这里 项目的基本结构就这样了,下面开始先讲如何搭建dubbo 并且测试:
这里是 api-core 里面包含的所有jar仓库:
	4.0.0

		cn.dubbo
		soa-dubbo
		0.0.1-SNAPSHOT

	cn.dubbo.core
	dubbo-core
	dubbo-core
	http://maven.apache.org

		UTF-8
		4.1.4.RELEASE
		3.0.5.RELEASE
		2.5.0


			junit
			junit
			4.0


			org.springframework
			spring-core
			${spring-ck.version}


			org.springframework
			spring-web
			${spring-ck.version}


			org.springframework
			spring-oxm
			${spring-ck.version}


			org.springframework
			spring-tx
			${spring-ck.version}


			org.springframework
			spring-jdbc
			${spring-ck.version}


			org.springframework
			spring-webmvc
			${spring-ck.version}


			org.springframework
			spring-aop
			${spring-ck.version}


			org.springframework
			spring-context-support
			${spring-ck.version}


			org.springframework
			spring-test
			${spring-ck.version}


			com.alibaba
			dubbo
			2.5.3


					spring
					org.springframework


			org.apache.zookeeper
			zookeeper
			3.4.6


			com.netflix.curator
			curator-framework
			1.1.10


			com.101tec
			zkclient
			0.6


			javax.servlet
			jstl
			1.2


			org.mybatis
			mybatis
			3.2.8


			org.mybatis
			mybatis-spring
			1.2.2


			mysql
			mysql-connector-java
			5.1.34


			com.alibaba
			druid
			1.0.12


			org.aspectj
			aspectjweaver
			1.8.4


			org.codehaus.jackson
			jackson-mapper-asl
			1.9.13


			com.alibaba
			fastjson
			1.2.3


			com.fasterxml.jackson.core
			jackson-annotations
			${jackson.version}


			com.fasterxml.jackson.core
			jackson-core
			${jackson.version}


			com.fasterxml.jackson.core
			jackson-databind
			${jackson.version}


			commons-io
			commons-io
			2.4


			commons-fileupload
			commons-fileupload
			1.2.2


			javax.servlet
			javax.servlet-api
			3.0.1


			com.jfinal
			jfinal-weixin
			1.7


			org.springframework.data
			spring-data-redis
			1.4.0.RELEASE


			org.springframework.data
			spring-data-redis
			1.6.2.RELEASE


			redis.clients
			jedis
			2.8.0
然后是dubbo-api 第一个接口:
import org.dubbo.pojo.User;

public interface UserService {
	User findById(int id);
}
然后是dubbo-api-imp 实现:
@Service("userService")
public class UserServiceImp implements UserService {

	@Resource
	UserMapper userMapper;

	public User findById(int id) {
		User us = userMapper.findById(1);
		return us;
	}

}
然后是UserMapper:
public interface UserMapper {
	User findById(int id);
}
然后是一个dubbo的运行类里面就一个main方法:
public class DubboMain {

	static ClassPathXmlApplicationContext context;

	public static void main(String[] args) throws IOException {
		context = new ClassPathXmlApplicationContext(
				new String[] { "dubbo.xml" });
		context.start();
		System.in.read(); // 按任意键退出
	}

}
下面出来的基本都是配置文件了:
db.properties 数据库资源文件
driverClassName=com.mysql.jdbc.Driver
url=jdbc:mysql://localhost:3306/wb??useUnicode=true&characterEncoding=UTF-8
username=root
password=1234
c3p0.pool.size.max=20
c3p0.pool.size.min=5
c3p0.pool.size.ini=3
c3p0.pool.size.increment=2
dubbo.xml
log4f.properties
### set log levels ###
log4j.rootLogger = INFO , C , D , E

### console ###
log4j.appender.C = org.apache.log4j.ConsoleAppender
log4j.appender.C.Target = System.out
log4j.appender.C.layout = org.apache.log4j.PatternLayout
log4j.appender.C.layout.ConversionPattern = [%p] [%-d{yyyy-MM-dd HH:mm:ss}] %C.%M(%L) | %m%n

### log file ###
log4j.appender.D = org.apache.log4j.DailyRollingFileAppender
log4j.appender.D.File = ../logs/ServerManager-Info.log
log4j.appender.D.Append = true
log4j.appender.D.Threshold = INFO
log4j.appender.D.layout = org.apache.log4j.PatternLayout
log4j.appender.D.layout.ConversionPattern = [%p] [%-d{yyyy-MM-dd HH:mm:ss}] %C.%M(%L) | %m%n

### exception ###
log4j.appender.E = org.apache.log4j.DailyRollingFileAppender
log4j.appender.E.File = ../logs/ServerManager-Error.log
log4j.appender.E.Append = true
log4j.appender.E.Threshold = ERROR
log4j.appender.E.layout = org.apache.log4j.PatternLayout
log4j.appender.E.layout.ConversionPattern = [%p] [%-d{yyyy-MM-dd HH:mm:ss}] %C.%M(%L) | %m%n

log4j.logger.com.strive.cms=DEBUG
mybatis-config.xml; 里面的配置先别管 redis 缓存的时候会用到
applicationMybatis.xml 文件中上面 三个bean 涉及到 redis 可以先不管,只要api-core里面 包导的没错 不会报错的 你也可以先删除了
redis.properties 我这里就一次性 先贴出来了 免得等下又贴配置文件
redis.host=127.0.0.1
redis.port=6379
redis.pass=
redis.maxIdle=300
redis.maxActive=600
redis.maxWait=1000
redis.testOnBorrow=true
好了这样dubbo就差不多了 只是运行一下 看效果不跟mybatis打交道的话
根据上面所说的 配置好
zookeeper 然后找到启动文件zkServer.cmd 点击运行 会出现: 
出现了这个 继续运行 找到dubbo-api-imp 实现里面的 哪个DubboMain 点击运行main 如果不报错 你会看到以下图 如果报错说明 你api-core里面导的 包有问题:

这边没报错,好的离成功 又近了一步 回去看 zookeeper 运行的命令窗口 会看到:

如果这上面 打印了你在项目中写的接口 证明你又离成功 又近了一步了,然后我们继续 往下整,整mybatis数据库查询数据:
下面开始截 dubbo-action 里面的配置以及代码:
action 如下:
@Controller
@Scope("prototype")
@RequestMapping(value = "/wx")
public class UserAction {

	@Autowired
	public UserService userService;


	@RequestMapping(value = "/listUsers", method = RequestMethod.GET)
	public ModelAndView listUsers(HttpServletRequest request) {
		ModelAndView andView = new ModelAndView();
		User u = userService.findById(1);
		andView.addObject("A",u);
		andView.setViewName("index");
		return andView;
	}
}
然后是 配置文件 以及jsp :
首先是web.xml: 一个web程序的入口就是web.xml 这里就简单的配置了一下
		springmvc
		org.springframework.web.servlet.DispatcherServlet

			contextConfigLocation
			classpath*:springmvc.xml

		1


		springmvc
		*.do


		SpringEncodingFilter
		org.springframework.web.filter.CharacterEncodingFilter

			encoding
			UTF-8


			forceEncoding
			true


		SpringEncodingFilter
		/*


		log4jConfigLocation
		classpath:log4f.xml


		controller
		controller-log


		loggingLevel
		info


		org.springframework.web.util.Log4jConfigListener


		login.jsp
然后是dubbo-action.xml文件
log4j.xml:
然后是springmvc.xml:
				classpath:/messages


				text/html;charset=UTF-8
然后在是 index.jsp文件 里面就一行代码 简单的输出了一下 ${A.name}
好了 到这里就可以简单的 测试一把 数据库查询了 记住前面那个main 运行dubbo服务别关了,这里直接把action部署到tomcat上运行
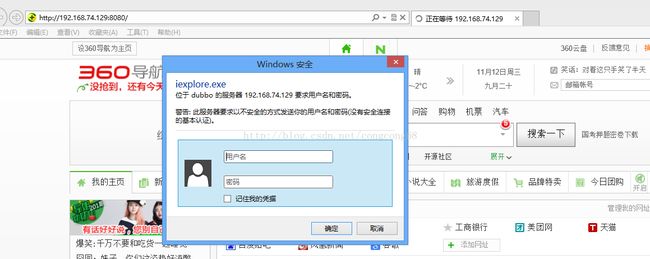
然后浏览器上访问: 提示这就说明 dubbo-springmvc-mybatis搭建完成了 并且数据库也通, 但是有的人直接按照我的配置来的话可能会出现连接错误,因为有的代码中设计到了 redis 所以在你运行这一步的时候 最好 保证配置好了redis 所以操作 ,并且我代码中有的你也有,最下面我会 贴上源码的下载地址:

上面 把redis 的配置文件都配好了 但是没截 redis 的执行代码 ,,这里附上代码
RedisCache.java
package org.dubbo.api.redis;
import java.util.concurrent.locks.ReadWriteLock;
import java.util.concurrent.locks.ReentrantReadWriteLock;
import org.apache.ibatis.cache.Cache;
import org.slf4j.Logger;
import org.slf4j.LoggerFactory;
import org.springframework.data.redis.connection.jedis.JedisConnection;
import org.springframework.data.redis.connection.jedis.JedisConnectionFactory;
import org.springframework.data.redis.serializer.JdkSerializationRedisSerializer;
import org.springframework.data.redis.serializer.RedisSerializer;
import redis.clients.jedis.exceptions.JedisConnectionException;
public class RedisCache implements Cache {
/**
* 日志
*/
private static final Logger logger = LoggerFactory
.getLogger(RedisCache.class);
private static JedisConnectionFactory jedisConnectionFactory;
private final String id;
/**
* The {@code ReadWriteLock}.
*/
private final ReadWriteLock readWriteLock = new ReentrantReadWriteLock();
public RedisCache(final String id) {
if (id == null) {
throw new IllegalArgumentException("Cache instances require an ID");
}
logger.debug("MybatisRedisCache:id=" + id);
this.id = id;
}
public void clear() {
JedisConnection connection = null;
try {
connection = jedisConnectionFactory.getConnection();
connection.flushDb();
connection.flushAll();
} catch (JedisConnectionException e) {
e.printStackTrace();
} finally {
if (connection != null) {
connection.close();
}
}
}
public String getId() {
return this.id;
}
public Object getObject(Object key) {
Object result = null;
JedisConnection connection = null;
try {
connection = jedisConnectionFactory.getConnection();
RedisSerializerRedisCacheTransfer.java
package org.dubbo.api.redis;

import org.springframework.beans.factory.annotation.Autowired;
import org.springframework.data.redis.connection.jedis.JedisConnectionFactory;

/**
 *
 * @描述: 静态注入中间类
 */
public class RedisCacheTransfer {

	@Autowired
	public void setJedisConnectionFactory(
			JedisConnectionFactory jedisConnectionFactory) {
		RedisCache.setJedisConnectionFactory(jedisConnectionFactory);
	}

}
SerializeUtil.java
package org.dubbo.api.redis;

import java.io.ByteArrayInputStream;
import java.io.ByteArrayOutputStream;
import java.io.ObjectInputStream;
import java.io.ObjectOutputStream;

public class SerializeUtil {
	public static byte[] serialize(Object object) {
		ObjectOutputStream oos = null;
		ByteArrayOutputStream baos = null;
		try {
			// 序列化
			baos = new ByteArrayOutputStream();
			oos = new ObjectOutputStream(baos);
			oos.writeObject(object);
			byte[] bytes = baos.toByteArray();
			return bytes;
		} catch (Exception e) {
			e.printStackTrace();
		}
		return null;
	}

	public static Object unserialize(byte[] bytes) {
		if (bytes == null)
			return null;
		ByteArrayInputStream bais = null;
		try {
			// 反序列化
			bais = new ByteArrayInputStream(bytes);
			ObjectInputStream ois = new ObjectInputStream(bais);
			return ois.readObject();
		} catch (Exception e) {
			e.printStackTrace();
		}
		return null;
	}


	/**
	 *
	 * 反序列化
	 *
	 * @param bytes
	 * @return
	 */
	public static Object unSerialize(byte[] bytes) {

		ByteArrayInputStream bais = null;

		try {
			// 反序列化为对象
			bais = new ByteArrayInputStream(bytes);
			ObjectInputStream ois = new ObjectInputStream(bais);
			return ois.readObject();

		} catch (Exception e) {
			e.printStackTrace();
		}
		return null;
	}
}
好了这里所有的代码 就全部完了,,至于那个User类我就不截图了,,
正常来说 在没配置 redis 之前执行那个查询 IDE后台是会打印执行的sql语句的 我这里 直接配置了 因为之前执行过 所以我这里直接读的是缓存里面的 而不是读的数据库里面的 如图所示:
忘了说想看是不是走的缓存 你得先在命令行 执行定位到 redis当前所在目录然后在执行:

这是源代码的下载地址: 这个可能有点坑 要1积分,,没办法在csdn上传的资源 最低要求1 积分:http://download.csdn.net/download/wangbo54979/9960339 后续会把代码 上传到git上,,在更新下载地址 https://github.com/wb90/test-model